Saturday, December 22, 2012

A Gift of Time


Original Look


Detail of Gears

A gift of time is just what I needed!!!  I have had a bit of an absence due to other projects (including this one) and family/job issues, but now I'm back!!  This is a clock I made for the Andy Skinner Class, Timeworn Techniques.  I wanted to make something for the class from something old, and give it a look of an old factory.  My wonderful husband, who repairs clocks for a living, donated an old kitchen clock case to my cause.  The clock is from the late 1800 to early 1900's.  This poor thing had been abused and broken beyond reasonable repair.  I decided it would be perfect for the final project for his class.  It now has a new look and a new purpose!!


Burnt Copper and Brass Finish

 Utilizing the techniques from his class, I applied several of his techniques to apply different finishes to the clock.  There is dry brushing to apply rust finish and old brass finish.  Copper with both patina and burnt finishes.  There is chipped paint and chipped/painted tin finishes.  The little tank is a technique I learned from Tim Holtz's Compendium of Curiosities II and it worked perfectly in my time factory!


Chipped Paint and Chipped Tin


Burnt Copper

This was such a great project for me.  I had to plan the clock in several different stages so each level didn't interfere with the one before it.  In the end, the little broken clock gave me a gift of pleasure and fun, and I gave it the gift of a new purpose!

Merry Christmas All!!

Monday, October 15, 2012

Perfect Gardening Pearls


 This is a tag I created for the Studio L3 challenge using Tim Holtz's Compendioum of Curiosities II.  This week Linda is focusing on the use of the Perfect Pearls line and using the Ranger palette as described in Tim's book.  This has been one of the most convenient little techniques for using Perfect Pearls that I have discovered! 


The top and bottom of the packets and the veggies are colored in Perfect Pearls which I purchased at Simon Says Stamp!  I just love that online store!  The background of the the packet is colored in using Tim Holt's Distress Markers and a water brush. 

Sunday, October 14, 2012

Forest Secrets


 This is a creation I made today for Simon Says Stamp and Show! challenge this week "Rustification".  This was a really exciting project for me because I was able to use several new items in the layout as well as practice some new techniques I've learned. 

The background paper is a beautiful hand-made mulberry paper with leaves and grasses in embedded in the paper.  I recently acquired a full set of Adirondack Color Wash so I was anxious to try them on the paper.  I was thrilled with the color!  I further distressed the paper with some dripped and splattered water for a anged, washed effect.

Love, Wish, Dream is of course a Tim Holtz stamp!  A piece of chipboard was inked with Distress Ink, both walnut stain and frayed burlap.  I heat embossed with UTEE twice and stamped the still soft UTEE with the stamp.  At first I didn't like the relief so I re-heated for the final effect.. 


The florals of course are from Tim's Sizzix die, tattered florals die.  I sprayed kraft glassine with my favorite colors of Color Wash, hand rubbed the color in.  I dried the ink and then sprayed with Perfect Pearls and water.  This is one of my "new" favorite techniques!
 Now for the "rustification" part.  The clock is done using acrylic paints, modeling paste and a dry brushing technique to imitate rust.  This is the same technique I have learned and showcased in my "My Secret Book" post.  Please visit that post for more information.

Thanks again for stopping by, and as always, let me know if you have any questions.

Heather


Sunday, October 7, 2012

Falling

 
Ok, this is just a short post!  I just had to try to capture our beautiful fall colors here in the western slope of Colorado!  My leaves are Kraft Glassine (Tim Holtz) sprayed with Ranger Color Wash which I hand rubbed (messy) into the glassine.  The Paper was previously stamped with a world map stamp using archival black.  I was absolutely thrilled with the color variations!  I then sprayed the sheet generously with sunflower Perfect Pearls in water.  The effect is really not captured here very well---you must try it to appreciate how beautiful it really is!

My butterfly was stamped in archival black and heat embossed using ultra-fine embossing powder.  I colored him in with Distress Markers and sealed with Plaid-Liquid Embossing product.  I really like how well this goes on and stays in place.  I think I need to enter this in the Simon Says Stamp and Show leaf-spiration challenge :-)

Cherish Peace


 This tag was inspired by the Simon Says Stamp and Show! challenge for this week "leaf-spiration".  This turned out to be one of those projects where the embellishment created the card!  I wanted to think of the very last days of fall when we transition into winter.  The last leaves are still falling and the very first snowflakes start to appear. 


The leaves are Tim's Kraft Glassine that was stamped with a music themed stamp and black archival ink.  They were then distressed with walnut stain Distressed Inks.  I crushed the leaves and sprayed with a mist of water to allow the stain to run into the creases.  I then dried them with my craft dryer.  Distress Stain metallics were put on my non-stick craft sheet and the leaves dipped into the mix and dried again x 3.  I liked the effect because it reminded me of frost.

 The background is a manilla tag altered with stormy sky, broken china and  frayed burlap Distress Stains.  I misted the card and dried it to allow the colors to blend.  I then distressed the card with pumice stone and vintage photo from the Distress Ink line.  The swirl stamp is from the Tim Holtz collection using walnut stain Distress Ink and sprayed moderately with Perfect Pearls, biscotti.  My little snowflakes are heat embellished with Perfect Pearls copper mixed with UTEE,  I love this technique!!  As always, thank you for stopping by, and please contact me if you have any questions :-)
                     

Wednesday, September 5, 2012

My Secret Book


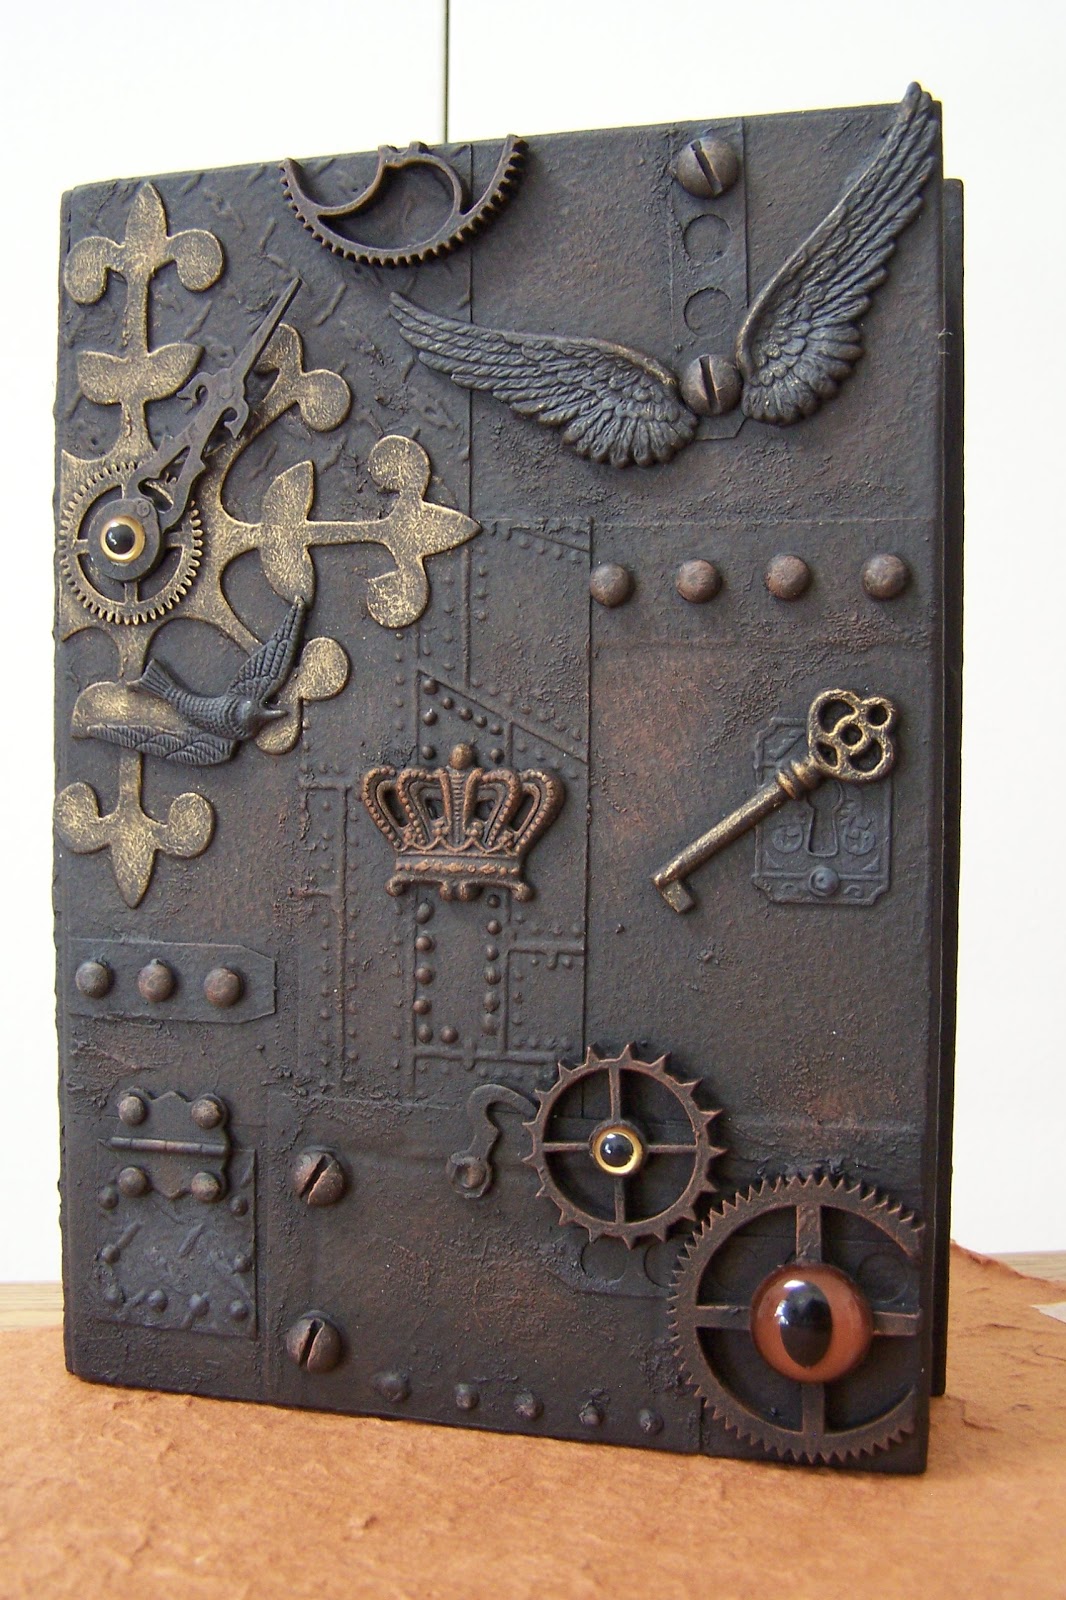
Steam-Punk Book of Secrets


I am SOOOO excited about this project!!!  This is a book I just finished for an online class that I took from Andy Skinner, the Book of Secrets Class.  This is an actual wooden box with a pull out drawer and Andy shows you how to put the steam-punk style finish on the box.  I was so enthralled with the class that I spent almost all of friday working on this.

Back of Book


Spine of Book


   The book is covered in 300 gsm, watercolor paper, some of it embossed using Tim Holtz's embossing folders.   There is a mish-mash of embellishments on the book.  I have everything from chip-board, metal, actual clock gears and hands to wooden, laser-cut gears.  The eyes are something I picked up off of eBay.  The screws are actual bolts from my husband's clock repair shop that I cut the heads off of and mounted on the book.  Andy shows you how to put different effects on the book to add to the industrial effects, and he does this very well.
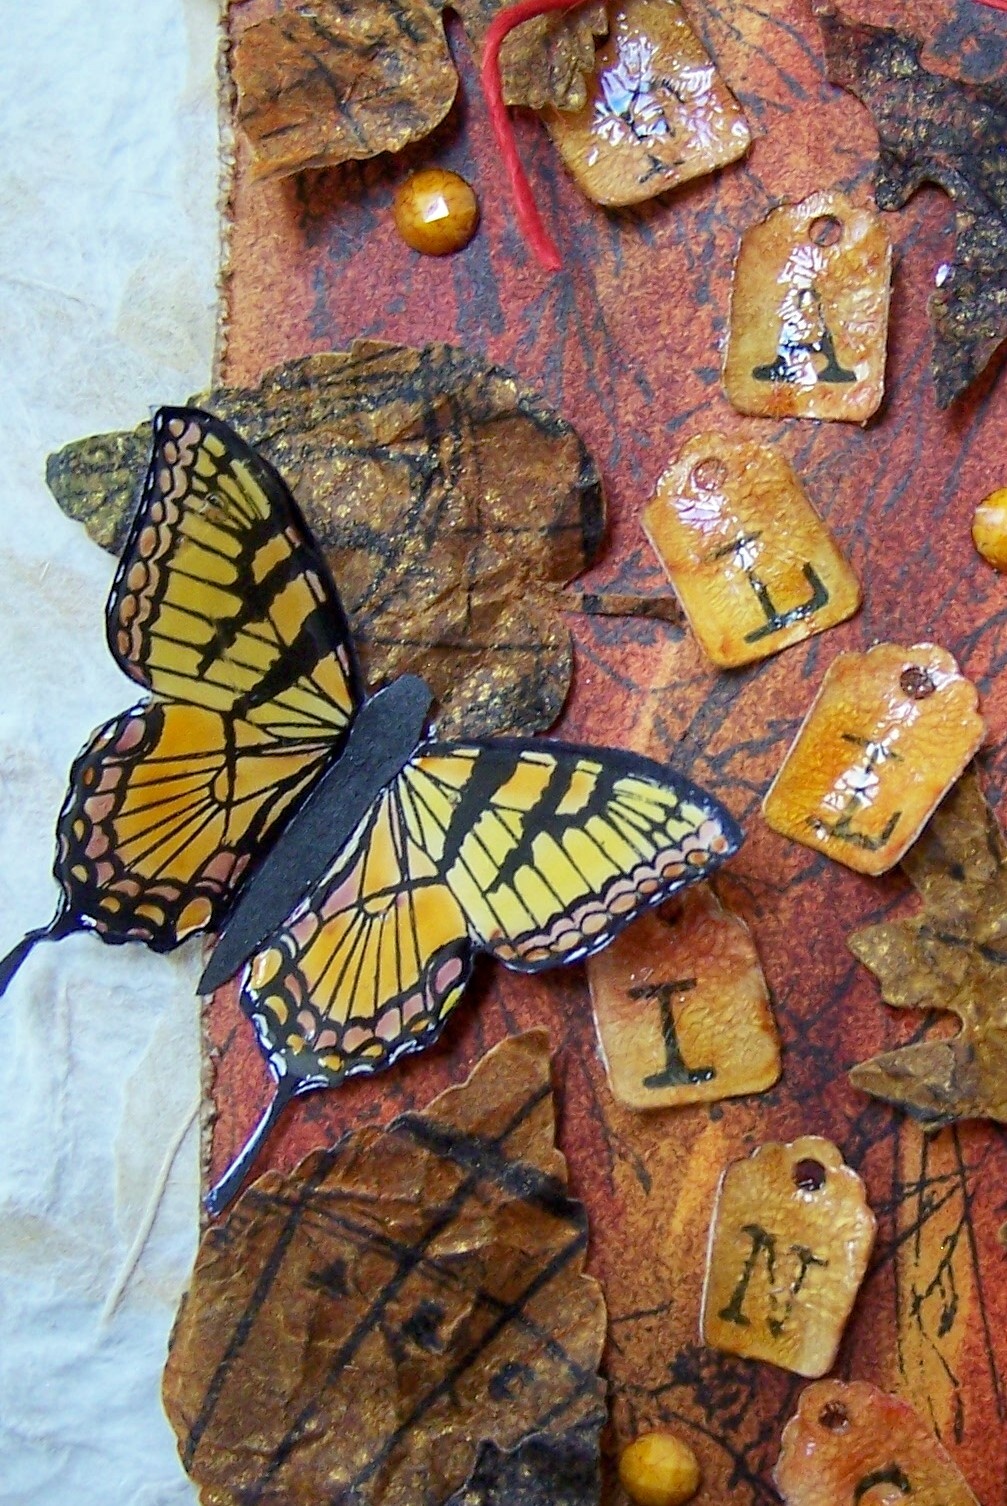
  
Close-up Front


Mystery Inside


These little oddities live inside of the drawer and are from Bead Landing (Michaels).  They are tubes that resemble glass fuses.  I placed peacock feathers inside, bent the copper pin that runs throught the tube at the ends.  I then drilled holes in the drawer and mounted them.  I will leave it up to your imagination as to what they look like-I was going for mystical! 

Drawer of Book

 This is with the drawer pulled out.  The watch inside really works.  It was taken apart and altered with Ranger's Alcohol Inks.  The Paper is from Studio 45's Olde Curiosity Shoppe pack.  The mulberry paper roses are in a little glass vase with long peacock feathers inside. 


I will be entering this in the Simon Says Stamp and Show challenge- Read All About It.  It seems very fitting.  You can visit the challenge at the Simon Says Stamp!
The Watch Works!
 blog site.  I really do love these guys!

Monday, September 3, 2012

Listen to Your Heart


I am submitting this Kraft Resist technique for Studio L3 at http://studiol3.blogspot.com/feeds/posts/default.   This technique is from Tim Holt's book Compendium of Curiosities vol. 2.  There is a GREAT video on Studio L3's site showing how to do this. 


In this tag, I essentially used the marbling technique for applying Distress Stains.  Somehow (magic) I ended up with what looks like a pretty pink flower in the background, soooo... I decided to go with it! The tag was stamped with Tim's stamps and Ranger Archival black, a few embellishments were added and POOF!   The wings were made using chipboard that had Ranger Distressed Stain applied, distressed with Ranger Distress Inks, misted with Perfect Pearls and then embossed with UTEE.  It was kind of an experiment and I really enjoyed how it turned out!


I have really enjoyed the Kraft Resist paper, but even more than that, I love making my own resist papers using embossing techniques on manilla tags:

Thank you for taking a peek!!  More great things to come!